Taking apart a Mercedes Transmission requires careful attention to detail. This guide continues our series on dismantling a 722.118 Mercedes transmission, focusing on safely removing key components. It’s crucial to proceed methodically to avoid damage and ensure a successful rebuild.
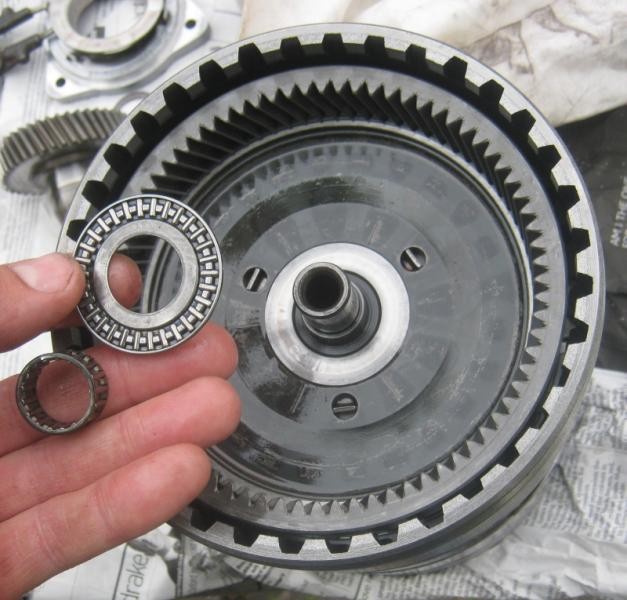
First, a word of caution regarding the intermediate shaft. At the rear end of the gear set, you’ll notice two delicate bearing races. These components are easily damaged, so carefully remove them from the shaft’s end and store them securely.
While the order isn’t strictly mandatory, removing the secondary pump cap at this stage can be advantageous. This cap, part of the pump casting, is secured with a unique dzus head fastener. Corrosion can sometimes make removal tricky. In my experience, carefully cleaning away any corrosion around the fastener can allow a rounded-off bar to be used for leverage to loosen it.
Below are images illustrating the secondary pump cap on this Mercedes transmission.
And here are views of the pump itself, once the cap is removed from the Mercedes transmission housing.
At this point in the Mercedes transmission disassembly, you will only be able to remove the cap section along with the return pressure spring from the secondary pump casting. The remainder of the secondary pump is held in place by a locating bolt. This bolt is accessed from inside the tail cone section, and cannot be removed until the tail cone is detached.
Now we can proceed to detach the tail cone section. After removing all the bolts securing the “tail cone” casing, it should be safe to carefully pull it away from the main center casing of the Mercedes transmission.
It’s worth noting that the ATSG manual suggests using a specialized puller tool for removing the tail cone. This puller is designed to stretch over the tail cone and grip at the joint between the tail cone and the main casing. According to the manual’s illustration, this tool is intended for use while the gear set and front bell housing are still in place, using the output shaft as leverage. Attempting to use this puller at this stage of disassembly could potentially push the output shaft further into the main casing, which is not desirable.
In practice, I found that the tail cone section could be loosened and removed with gentle and careful tapping using a rubber mallet.
With the tail cone section now removed from the Mercedes transmission, you’ll gain access to the governor.
Furthermore, you’ll see the cam follower for the secondary pump and the mechanical speedometer drive. To my knowledge, all 722.118 Mercedes transmissions are equipped with this mechanical drive.
This step-by-step process continues the teardown of the Mercedes transmission, bringing us closer to inspecting and rebuilding its intricate internal components. Remember to always consult your service manual and proceed with caution during any transmission work.